Showing posts with label photoshop. Show all posts

Monday, November 26, 2007

ACDSee Photo Organizer 10 - Brushes Update

Back in August I wrote about Organizing With ACDSee because I am such a fan of this program! The best time to start using this program is when you get started with digital scrapbooking because you have less supplies to organize at that time. As you all will know, it doesn't take long to collect and/or buy digital scrapbooking goodies once you start!

I recently updated to ACDSee 10 which gave me some great new features:

  • bigger previews
  • pop-up previews
  • being able to unzip my downloads right in ACDSee
  • a calendar view that lets me view my photos by date (you CAN use ACDSee for more than just your digital scrapbooking supplies!)
  • upload to selected online photo storage sites

Now, ACDSee has provided a free update to version 10 which allows you to . . . drum roll, please . . . work with your brush files from editing programs like Photoshop, Photoshop Elements and Paint Shop Pro!

As a lot of you have found out, brushes can be used much like "stamps" for digital scrapbooking and it is easy to build up a collection of them but when it comes time to choose and load them, the name of the brush set doesn't always give you a clear picture of what is inside the file. Of course, previewing the file doesn't help much as you can see from this screen shot:


Brush Thumbnail Image


Now, though, not only can you view the brush set but you can view the individual files within the brush set! That's great to start with but there's more!

You can now install those brushes into Photoshop or Photoshop Elements from within ACDSee! In addition, you can organize your brushes just like your other supplies, grouping them into categories for brushes like the following:

  • grunge
  • word art
  • Christmas
  • flowers

You may also create a Contact Sheet showing all the brushes contained within the brush set and add this to your organization system.

What are you waiting for? If you want to see this update in action, check out the video on Digiscrapinfo.com. If you already have ACDSee 10, you can get this update. If you haven't yet updated, you can get in on their holiday specials by buying the program with a buddy. (Scroll down to the third deal for $59.99.)

Now . . .


Go get this deal!
Sunday, October 7, 2007

All Talk and No Action?

One of the major differences between Photoshop and Photoshop Elements is the ability to create actions. Actions are like one-button shortcuts for a repetitive, multi-step task. Actions do things like create torn edges, create ribbons, create photo effects . . . almost anything you can think of can be done with an action!

Photoshop Elements users, to a certain extent, also have the ability to use actions but they will be found in the Styles and Effects palette. Elements users do not have the ability to create their own actions.

For those designers using Photoshop who wish to create actions that are useable by Photoshop Elements owners, there are a few things to keep in mind:

  1. Actions cannot call another action.
  2. Action sets may only contain a single action.
  3. Some Photoshop functions and modes are simply not available in Elements and actions which contain these will not work in Elements.

Additional steps must be taken to prepare an action for use in Photoshop Elements. For further information on this, visit Sue Chastain at About.com: Graphics Software.

Friday, September 28, 2007

Monitor Your Layouts by Measuring Your Monitor

As designers, we are frequently reminded to check our work at 100% zoom. This is to be sure that we leave no stray pixels on our designs. Also, working at 100% helps in erasing or masking difficult areas.

As a digital scrapbooker, however, I would encourage you not to rely on 100% zoom to check your layouts. You may have noticed that when you use 100% zoom, your layout is HUGE! You can only see a small section at a time at this zoom percentage. Relying on this will not give you the true look of your layout when it has been printed. That's how you and others will be viewing it, right?

The correct way to view your layout as it will look after it's printed is to click on the Print Size button on the Options Bar while the Zoom Tool is selected. (Photoshop and Photoshop Elements) However, to be sure your view is accurate, you must do some advance preparation.

First, measure the width of your screen in inches. Second, determine the resolution that you are using. (Do this by right clicking on the desktop, choosing Properties, and then choosing the Settings tab. Note the Screen resolution given for your monitor. Third, divide the width into the resolution and round to the nearest whole number. Fourth, in Photoshop or Photoshop Elements choose Edit, Preferences, Units and Rulers. In the New Document Preset Resolutions, set your Screen Resolution to the whole number you got at pixels/inch. Lastly, restart Photoshop/Photoshop Elements to use your new settings. If you take a ruler and measure an inch when you have your own rulers turned on, you should see that the measurement is now accurate.

Examples:

The width of my main monitor is 14.25 inches. My screen resolution is set to 1600 x 1200.

1600 divided by 14.25 = 112.28070175438596491228070175439

112.28070175438596491228070175439 rounded to the nearest whole number is 112.

112 is the setting I use in my Preferences.

The width of my secondary monitor is 13.25 inches. My screen resolution is set to 1280 x 1024.

1280 divided by 13.25 = 96.603773584905660377358490566038

96.603773584905660377358490566038 rounded to the nearest whole number is 97.

97 is the setting I use in my Preferences.

The width of my laptop monitor is 13 inches. My screen resolution is set to 1280 x 800.

1280 divided by 13 = 98.461538461538461538461538461538

98.461538461538461538461538461538 rounded to the nearest whole number is 98.

98 is the setting I use in my Preferences.

Using this strategy, you will have better success in judging what textured papers will look like once they have been printed. For more help with textures, read my previous articles, Adding Texture to Your Layouts and Using Patterns to Add Texture. Try using these settings and see if you get a more accurate view of your layouts. Leave me a comment below as to how you made out with this strategy!

Wednesday, August 22, 2007

Adding Texture to Your Layouts

One of the things that has always caught my eye in all forms of art is texture. If a photo or painting or layout makes me FEEL a part of it, I consider it to be a very successful example of art!

Texture can be defined as "A distinctive, complex underlying pattern or structure." In traditional paper scrapbooking, you can't help but have texture in your layouts because you are working with tactile items - papers, ribbons, buttons, fabric. Of course in digital scrapbooking, we use those same items and through the clever use of bevels and shadowing, we can achieve that same texture and depth in our layouts.

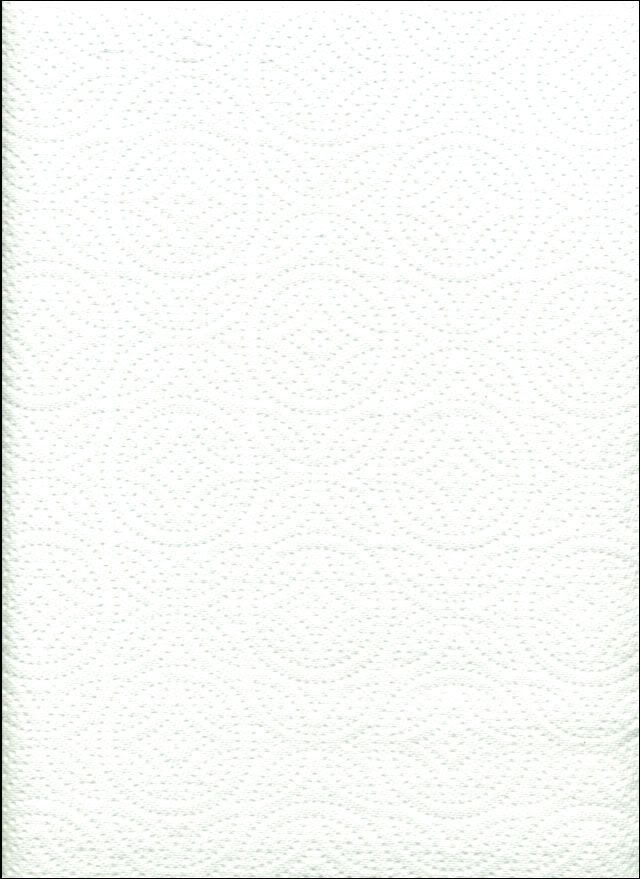
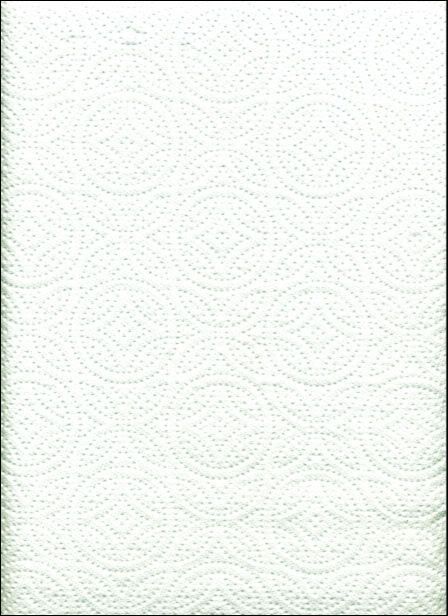
One way to add texture using either Photoshop or Photoshop Elements is to do just that! You will need to use the Texturizer filter by choosing Filter, Texture, Texturizer from the menus. The Texturizer offers 4 default textures which are always on the drop down menu. In addition, whatever the last texture was that you used, that will be in place when you next use the Texturizer. You may also choose to load a texture by clicking the right-facing arrow and choosing Load Texture. This is where the REAL fun comes in! The texture that you add needs to be a file in .psd format but it can be of anything! You could save a photo as a .psd file (think pictures of bark, gravel, grass, seashells, etc.). You can also scan in items and use those (think fabric, wood, coffee beans, candies, etc.). Below, I will describe how I scanned in a paper towel to use with the Texturizer filter.

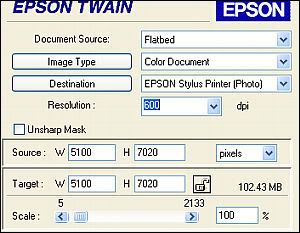
First, since most of you will not have a super-duper scanner capable of scanning in something that would cover a 12 x 12 inch area, you will need to use the settings I used to accommodate for this lack. Though each scanner is different, you will want to scan as large an item as possible. My paper towel basically covered the scanner because it was a really long paper towel! Because I wanted its end size to be 12 x 12 inches or 3600 x 3600 pixels, I needed to scan it larger than at 300 dpi because that would not have been big enough. I doubled the dpi to 600 and scanned.


Click image for larger view

Once I had the document in Photoshop, I saw that it was much too bright, not allowing me to see the details of the paper towel. I added a levels adjustment to make the pattern stand out more on the paper towel. I was not worried by the outside shadowing of the edges because I knew I would be cropping those off.

Click image for larger view

Click image for larger view

Next, I got rid of the color in the paper towel by using the shortcut Control+Shift+U which desaturated the image.

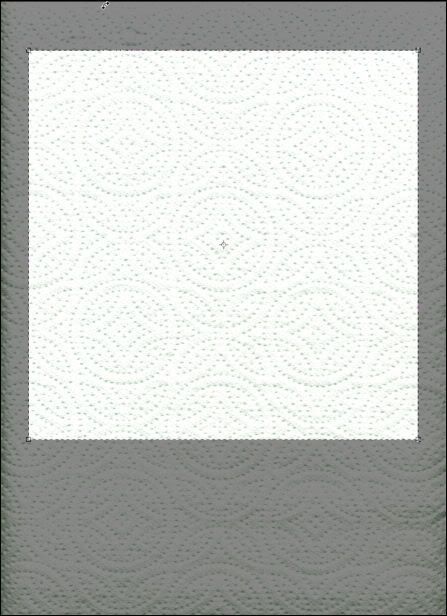
Next, I chose the Crop Tool and used the settings of 12 in for both Height and Width and set the resolution to 300. I pulled out the crop tool on the image and then moved the selection around to try and get the best selection of the pattern.


Click image for larger view

After cropping, I saved the document as paper_towel.psd in my folder for textures (this is a folder that I keep outside of Photoshop/Photoshop Elements).

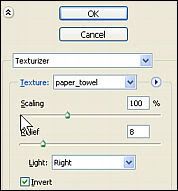
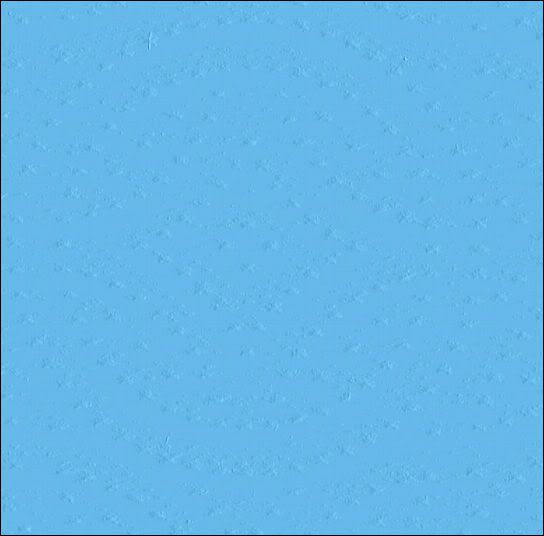
Now, let's apply it. I created a new document and filled the layer with blue. I then chose Filter, Texture, Texturizer. Click on the right-facing arrow and choose Load Texture. Navigate to where you saved the scanned item and choose it. Next, you will need to adjust the Scaling, Relief and Light settings to get the look you want for your paper.


Click images for larger view

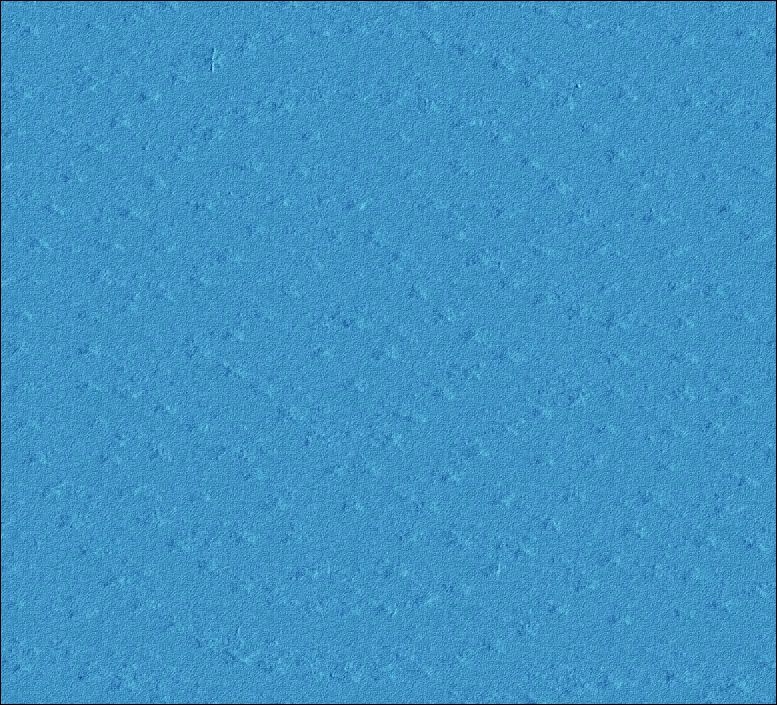
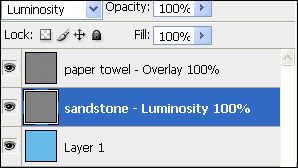
One other way to add texture using the Texturizer is to add a new layer and fill it with 50% gray by choosing Edit, Fill, 50% Gray. On the Layers Palette, change the layer blend mode from Normal to Overlay. Go ahead and apply your texture to this gray layer. Then, if the texture is too strong, you can adjust the opacity to suit. Also try different blend modes. Using this separate layer for the texture also works well if you want to mix more than one texture. On the image below, I applied my paper towel texture to one layer and set the layer blend mode to Overlay. On another layer, I applied the Sandstone texture and set its blend mode to Luminosity.

Click images for larger view

Hope you have fun experimenting with this texture technique! If you come up with some unique textures, please leave me a comment!

Monday, August 13, 2007

Sneak Peak and a Few Odds & Ends - UPDATED!

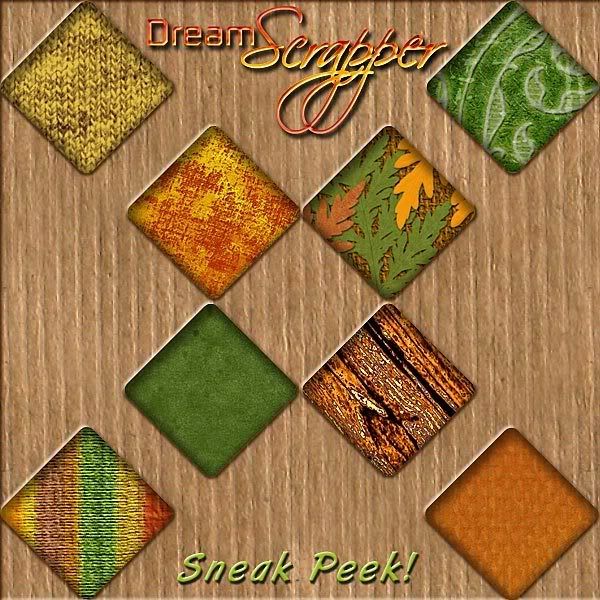
The time is drawing nearer . . . when I can actually open the doors to DreamScrapper.com! Today I am offering you a little sneak peek. Be aware that you really MUST see the product because the preview cannot show it to its fullest potential. Be sure to click on the image below to see the detail in this preview.


You will definitely want to get this for all your Fall layouts . . . and this sneak peek is just showing you the papers . . . just wait!


Now for a few tips I have picked up in the last few days . . .


Boring Photoshop/Photoshop Elements Desktop Color

Have you ever wanted to change the color of your Photoshop or Photoshop Elements desktop? You know, that boring grey color that surrounds the maximized layout or photo on which you are currently working? Well, there IS a way to do just that!

  1. First, you must have a document open.
  2. Maximize the document by double-clicking the top bar of its window.
  3. Select the color that you want by clicking the Foreground color.
  4. Select the Paint Bucket tool.
  5. Shift-click on the desktop with the Paint Bucket. This color will stay until you change it to something else or reset your Photoshop preferences file.
  6. If you ever want to change back to the grey color that you had before, you can simply select the Eyedropper tool and click and hold on the Photoshop desktop and then drag over to one of the palettes until the color changes back to grey. If you just want to select the grey color, click on the foreground color and type c0c0c0 in the box beside the #. (That's C-zero-C-zero-C-zero)


Missing .PSD Thumbnails in Windows Explorer

Have you ever been frustrated because you cannot view a thumbnail for your Photoshop or Photoshop Elements files when viewing files in Windows Explore? Tell me, what use is it to see a colored square with .PSD on it? If this is the case for you, you will want to get ThumbView.


Unzipping Files

Are you still unzipping your downloaded files the old fashioned way? By that, I mean one by one by one. If this describes you, you need to UnZipThemAll. Load up all your downloads, whether they be .zip files, .rar files or some other type of archive file and let 'er rip!
Be sure to check out the way that you can customize the unzipping and file destinations.


UPDATE

I'm not sure what I was thinking when I posted about UnZipThemAll but though I have used and really liked it, I now use another program called ExtractNow. You will also want to try this one as I like it even better than UnZipThemAll.

Friday, August 10, 2007

Scrapbooking Shortcuts for Photoshop and Photoshop Elements

I use a number of keyboard shortcuts in Photoshop (PS) and Photoshop Elements (PE) to help me work faster and more efficiently. I hate having to dig through menus to find a command when I can execute it easily with a couple of keys!

Tonight, I have prepared my list of favorite shortcuts - the ones that I find useful and use frequently. I do not use ALL the shortcuts that are available for PS or PE - I draw the line at having to stand on my head while holding down five or more different keys at the same time, using various parts of my body, in order to execute a command! There is only one shortcut that I will list here that uses four keys at the same time but the shortcut is so useful to me and I use it so frequently that my dexterity has improved considerably since I began using it!

It is my hope that you will try out some of the keyboard shortcuts on my list and find the ones that work the best for you. Once you have those ones memorized, you can always add more shortcuts to your scrapbooking arsenal, a few at a time.

Control+A . . . selects all of a layer or all of text that you are editing at the time

Control+C . . . copy a selection of text or something that is selected with a marquee of some sort

Control+D . . . deselect

Control+E . . . select layers and then you can merge them together or if you are on a layer and choose this shortcut, you will merge down to the next layer

Control+I . . . this will invert colors on your current layer (black will become white, colors will change to their complementary colors)

Control+J . . . this is a BIG favorite of mine! This will duplicate the current layer or duplicate the current selection to a new layer. MUCH faster than right clicking and choosing duplicate.

Control+N . . . brings up the Create New Document dialog box

Control+T . . . Free Transform (thus the "T") and from here, I can right click to choose Distort, Skew, etc.

Control+V . . . pastes - this will be pasted onto a new layer so you don't have to create one first

Control+X . . . cuts the current selection

Control+V . . . temporarily lets you switch to the Move Tool from a different tool

Control+Z . . . backup one step (PS) or multiple steps if you repeat it in PE

Alt+Backspace . . . fills the current layer or selection with the foreground color

Control+Backspace . . . fills the current layer or selection with the background color

Control+Shift+I . . . this will inverse a selection

[ . . . using this square bracket key allows you to make your paint brush smaller

] . . . makes the paint brush bigger

D . . . using this letter will reset your color swatches to the default colors of black and white

X . . . swaps the foreground and background colors, whatever they may be

V . . . switches to the Move Tool


Now for my ultimate favorite shortcut . . . drum roll, please! . . .


Control+Alt+Shift+E . . . in PS, select your top most visible layer and this shortcut will merge all visible layers/effects to a new layer while leaving the existing layers intact. To execute this tricky shortcut, I use my ring finger on the Control key, middle finger on Shift, pointer finger on Alt and use my right hand to add the E. In PE, you will need to create the layer first.

One more set of shortcuts that is a life saver and works in both PS and PE is to easily center something on a layer (especially crucial to PE since there are no guidelines to use) . . .

  1. Control+A to select the entire layer.
  2. Control+X to cut the entire layer.
  3. Control+V to paste it back again. It will be exactly in the center of your document!
(Special note: This will NOT work with shapes - the layer must be rasterized first.)


I am sure there are other invaluable shortcuts that you have found to be useful. If you would like to leave me a suggestion for a useful shortcut, I will add it to the list here!

Thursday, August 2, 2007

If You Use Photoshop or Photoshop Elements, You May Need an Adjustment - UPDATED

. . . layer, that is! If you are anything like me, when you are creating a digital layout you may decide to try things many different ways before deciding on THE way! The beauty of using adjustment layers is that you can reserve the right to change your mind not once, not twice, but as many times as you want during the building of your layout and you can change your mind about color, contrast, patterns . . . the list goes on . . .

So, what ARE adjustment layers, you ask? Adjustment layers are special layers that provide different types of adjustments to a layer or layers beneath them. These adjustments are editable at any time, even after saving and closing the layered file, unlike simply choosing to apply a Hue/Saturation adjustment, for instance. In addition, these adjustment layers can have their opacity adjusted as well as their layer blend modes, just like regular layers. You can turn these adjustment layers on or off to see how they affect things. If that wasn't enough, all adjustment layers come with a layer mask which allow you to apply the adjustment to all or just a portion of a layer(s).

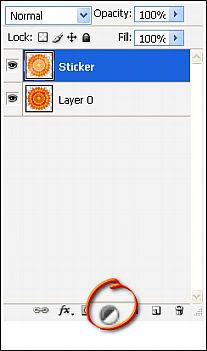
Icon for Add Adjustment or Fill Layer

Of course in Photoshop and Photoshop Elements, there are several ways to do things. To add an adjustment layer, you can choose Layer, New Adjustment Layer or on the Layers Palette you can click the icon that looks like a black and white beach ball. Your choice! Because there have been several tutorials written about adjustment layers, instead of reinventing the wheel, I will direct you to a few excellent resources to get you started using adjustment layers.


Photoshop Adjustment Layers 101
This is an excellent place to start learning about adjustment layers!

How to Use Layer Masks and Adjustment Layers in Photoshop Part 2
This resource is a video tutorial. It would be helpful for you to watch Part 1 which deals with layer masks, as they are mentioned in part 2. (Watch for a future blog post on layer masks!)

Using Photoshop Adjustment Layers
This is the most in-depth resource that I found on adjustment layers.

Tinting Tutorial
One other source of information on Adjustment Layers comes from Hummie. She shows ways to convert to black and white and tint a photo using a hue/saturation adjustment layer and also a way to tint a photo using the photo filter adjustment layer. This link takes you to the main tutorial page. Scroll down to find the tinting tutorial.

So, if you like to have flexibility in designing your digital layouts (and isn't this one of THE advantages to scrapping digital?) you will definitely want to try using adjustment layers!

Tuesday, July 31, 2007

Photoshop File (PSD) Extract/Recover Tool

One quick second post for you . . .

In my email today was a post mentioning a new plugin for Photoshop that not only lets you open individual layers from a .psd file without having to open the whole file but also aids in recovering those files that seem to "go bad." A free download is available, though the site encourages a $10 Paypal donation.

Now, a disclaimer . . . I have not yet tested this but thought I would make you aware of it and you can try it out for yourself. Get the Photoshop File (PSD) Extract/Recover Tool. (Scroll down for it.)

If you try it out, please leave me a comment with your results!