Showing posts with label scrapbooking tools. Show all posts

Saturday, May 17, 2008

Sketches: Everything You Ever Wanted to Know But Were Afraid to Ask

Back in October, I wrote Using Sketches as a Launching Point For Your Layout, a review of a book that I found useful in creating layouts. Just yesterday I picked up another useful resource on sketches - an issue of Scrapbooks Etc. by Better Homes and Gardens.

This is one of the BEST scrapbooking resources I have seen in awhile. This magazine would be suitable for both paper and digital scrappers and starts off by explaining the anatomy of a sketch. It also points out that sketches are invaluable because layout styles may come and go but the sketch, as the building block of a layout, can be reused over and over by changing the sketch's rotation, embellishments, and/or paper choice.

The magazine details how to scraplift any layout by identifying its underlying structure and then make it your own by stretching it or shrinking it to fit your desired scrapping size and modifying it according to your scrapping style. It shows several examples of layouts using the same basic sketch yet making it look completely different each time! Both paper and digital layouts are featured in this issue.

Most useful to paper scrappers is the fact that the photo spots in the sketches have the size detailed so that you can print or crop your photos to fit the layout.

The issue offers a summary of all the sketches contained in the magazine with accompanying page numbers so you can quickly flip to the pages detailing the sketch.

If you have ever wanted to use sketches to help you in your scrapbooking, don't miss getting this magazine! I picked mine up at McNally Robinson in Winnipeg for $15.95 but you can get it at Amazon or other major retailers. This magazine will prove a useful tool in your scrapbooking arsenal.

Saturday, October 13, 2007

Using Sketches as a Launching Point For Your Layouts

In a previous post, Style or Rut, I challenged you to try something new in your scrapbooking . . . a new technique, a new layout style, new colors, etc. Unfortunately, I haven't received any feedback from you as to whether you were able to meet this challenge. I would still welcome links to your layouts, both old and new, showing something new that you have tried.

To help you in this process of trying something new, I would like to suggest the book, Quick & Easy Sketches for Scrapbookers, available at Amazon.


Quick & Easy Sketches for Scrapbookers

Click image to be taken to Amazon.com


Though this book primarily features paper layouts, the book is designed as a resource for all types of scrapbookers, with the ideas and concepts presented easily applied to layouts created digitally.

To begin with, the main concept of the book is that you can use a sketch as a starting point to create very different layouts that utilize different scrapbooking styles. The book is then divided into chapters, according to the number of photos to be scrapped . . . 1, 2 to 3, 4 and 5, and finally 6 or more photos. Each chapter presents a variety of layout sketches with accompanying completed layouts showcasing three different styles:

  1. Simple - These pages are supposed to be uncomplicated yet stunning and could be completed in less than one hour.
  2. Graphic - These pages are more linear and follow the principles and concepts of graphically-inspired design on scrapbook pages.
  3. Enhanced - These pages showcase innovative techniques and elaborate designs.

This book should definitely inspire you to branch out and try a new technique or arrangement on your layouts.

I encourage you to leave me a comment below and/or links to your layouts. I look forward to hearing from you!

Sunday, October 7, 2007

Now That I've Got It, Where Do I Put It?

If you use Photoshop Elements for your digital scrapbooking, there are a wealth of add-ons that you may either download for free or purchase. These add-ons come as brushes, layer styles, shapes, patterns, gradients, custom color swatches and actions. However, knowing where to place these items so that you may actually use them in Photoshop Elements can be somewhat confusing!

If you are relatively new to using Photoshop Elements, the above terms themselves may be overwhelming . . . learning a new program is a bit like learning a new language, isn't it? To add to the confusion, there are many versions of Photoshop Elements being used and the places to install the various add-ons differs from version to version.

Sue Chastain at About.com: Graphics Software explains where to put all these great add-ons, no matter what version of Photoshop Elements you are using. In addition, Sue offers links to some freebies that you will want to download. Be sure to bookmark this site so you will have it when you need it!

Friday, September 28, 2007

Monitor Your Layouts by Measuring Your Monitor

As designers, we are frequently reminded to check our work at 100% zoom. This is to be sure that we leave no stray pixels on our designs. Also, working at 100% helps in erasing or masking difficult areas.

As a digital scrapbooker, however, I would encourage you not to rely on 100% zoom to check your layouts. You may have noticed that when you use 100% zoom, your layout is HUGE! You can only see a small section at a time at this zoom percentage. Relying on this will not give you the true look of your layout when it has been printed. That's how you and others will be viewing it, right?

The correct way to view your layout as it will look after it's printed is to click on the Print Size button on the Options Bar while the Zoom Tool is selected. (Photoshop and Photoshop Elements) However, to be sure your view is accurate, you must do some advance preparation.

First, measure the width of your screen in inches. Second, determine the resolution that you are using. (Do this by right clicking on the desktop, choosing Properties, and then choosing the Settings tab. Note the Screen resolution given for your monitor. Third, divide the width into the resolution and round to the nearest whole number. Fourth, in Photoshop or Photoshop Elements choose Edit, Preferences, Units and Rulers. In the New Document Preset Resolutions, set your Screen Resolution to the whole number you got at pixels/inch. Lastly, restart Photoshop/Photoshop Elements to use your new settings. If you take a ruler and measure an inch when you have your own rulers turned on, you should see that the measurement is now accurate.

Examples:

The width of my main monitor is 14.25 inches. My screen resolution is set to 1600 x 1200.

1600 divided by 14.25 = 112.28070175438596491228070175439

112.28070175438596491228070175439 rounded to the nearest whole number is 112.

112 is the setting I use in my Preferences.

The width of my secondary monitor is 13.25 inches. My screen resolution is set to 1280 x 1024.

1280 divided by 13.25 = 96.603773584905660377358490566038

96.603773584905660377358490566038 rounded to the nearest whole number is 97.

97 is the setting I use in my Preferences.

The width of my laptop monitor is 13 inches. My screen resolution is set to 1280 x 800.

1280 divided by 13 = 98.461538461538461538461538461538

98.461538461538461538461538461538 rounded to the nearest whole number is 98.

98 is the setting I use in my Preferences.

Using this strategy, you will have better success in judging what textured papers will look like once they have been printed. For more help with textures, read my previous articles, Adding Texture to Your Layouts and Using Patterns to Add Texture. Try using these settings and see if you get a more accurate view of your layouts. Leave me a comment below as to how you made out with this strategy!

Monday, August 27, 2007

Texture Challenge

Today I have a few more suggestions for how you can add texture to your layouts.

When you think of texture, I suggest that you start with a plain, color-filled layer. I find that when I start with a plain, flat layer, I can brainstorm different ways to "mess it up" using different techniques.

One of my favorite ways to add some texture is to add torn edges. These can be used on a photo matte or on other papers that form the background of your layout. For Photoshop users I definitely recommend the actions from Atomic Cupcake. Though you cannot buy individual actions at her site, a month's subscription will give you access to a multitude of action downloads that are well worth it! For the tearing actions, you will want to look for Torn Vellum, Torn and Inked, Medium Tear, Simple Tear, Wild Tear and Small Torn Edges. She also has a new one out called Folded Tear. Photoshop Elements users . . . though she does offer some actions that will work in your program, the tear ones are not available.

If you can't use actions, you may want to use paper templates to achieve the effect. Scrap Girls has one that you may want to try. They also have a very good tutorial for using the templates. There are also a number or tutorials on the web for creating torn edges (and here) and torn paper.

Click image for larger view and full credits

Also popular now are curled edges and folded corners. Templates are a great help in creating these quickly.


Click image for larger view and full credits

Texture can also be added by stamping (using brushes), chalking, painting, sanding and inking. I recommend the Digital Distressing Kit by Nancy Rowe Janitz which gives you not only brushes but .png files to create your own brushes for sanding, chalking, distressing, stamping, painting and inking. The kit also includes overlays in each of the styles. As well, you get a nice tutorial in .pdf format explaining how to use each of the tools.


Click image for larger view and full credits

Stitching is also a favorite technique to add some texture to layouts. You can purchase both stitching brushes and stitching as .png files. For some very realistic stitching, I recommend either Gina Miller or Ztampf! Stitching is very versatile and can be used as a border, to anchor items, as embroidery and as actual frames.

Click image for larger view and full credits

I hope you are still with me after all those possibilities for using texture!

I would now like to issue a challenge to all of you. Send me a link to what you consider your BEST layout that uses texture in one of the ways discussed either here or in my earlier articles Adding Texture to Your Layouts or Using Patterns to Add Texture. I will choose my three favorite layouts and those layout creators will win this quick page:


Click image for larger view

Deadline for entries is September 3 and I will announce the winners the next day. You can either email me or add a comment under the layout with your link. Put TEXTURE CHALLENGE as the subject for the email. Please, if you leave a comment, please supply me with an email in case I need to contact you about your layout. Remember, only ONE entry per person.

Good luck with your layouts! I can't wait to see what you come up with!

Sunday, August 26, 2007

Using Patterns to Add Texture

In my previous article Adding Texture to Your Layouts, I demonstrated how to use the Texturizer filter in Photoshop (PS) and Photoshop Elements (PE). This technique actually added a texture by embossing it onto your layout.

Another way to add texture is to simply add some kind of pattern. Both PS and PE have several sets of patterns from which to choose. A pattern may be applied directly to a layer or selection by using the Paint Bucket tool set to Pattern. Using this method, the only options available are opacity and mode. There is no control over the scale of the pattern using this method. Also, the pattern cannot be edited after applying it.

My preferred method for both PS and PE is to add a Pattern adjustment layer. You do this by clicking on the little black/white beach ball icon on the Layers Palette and choosing Pattern. If you are wanting to apply a pattern just to one specific layer, you should be sure to hold down Alt before trying to add the adjustment layer. When you use this method, you must click and hold on the beach ball icon. You will get a pop up dialog and you must be sure to check off the check box that is available. In PS CS3, mine says "Use Previous Layer to create Clipping Mask" but in other versions of PS and in PE, I believe that it says something about grouping with previous layer. Then click OK to apply the adjustment layer and choose the pattern that you want. (You must do this so that the pattern only affects the layer directly below it. If you don't group, the pattern will be applied to every layer below it.)

Using the adjustment layer method, you will have the ability to adjust the scale of the pattern. Also, because you are using an adjustment layer, at any time you may double-click on the thumbnail of that layer to edit the scale and/or pattern.

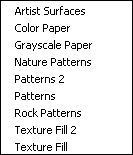
There are several pattern sets available to you:


To get to these different sets, once you have the Patterns before you, you click on the right-facing arrow and choose from the list. You may also choose to load or replace the pattern sets with ones you have downloaded or created.

After choosing a pattern, return to the Layers Palette and try different layer blend modes. I generally make use of Multiply, Color Burn, Linear Burn, Overlay, Soft Light, Hard Light, Vivid Light and Luminosity. You may also adjust the opacity of these, though this will limit not only the color produced with your layer or selection but also the pattern itself.

Don't discount some of the more garish patterns, especially the colored ones. Even if the color is not what you want, there is a simple trick to use that pattern the way you want! The trick is simply to use a different blend mode for the adjustment layer! Quite often, I will use luminosity for a colored pattern but if the result appears too bright, I may experiment with Overlay or Soft Light.

Similarly, you should definitely experiment with the scale setting for the patterns. Patterns that I would not even think of using look totally different and acceptable at a different scale setting. Let's look at some examples. (Be sure to click on the images for a larger view to be able to see the texture at 100%)

I definitely would not use the Nebula pattern (Patterns set) in its normal state because it is much too garish! However, if I change the blend mode to Luminosity, the resulting pattern looks acceptable. I can even choose to add another Pattern adjustment layer and choose a different pattern, blend mode and opacity. (To add another pattern, simply click or hold Alt and click on the beach ball icon again, and add another Pattern adjustment layer.) I will add Ant Farm at a scale of 50 with the blend mode set to Lighten at 75% opacity.


Starting Layer

Nebula Pattern added with
blend mode set to Luminosity at 100%


Second pattern added - Ant Farm
at a scale of 50 set to Lighten
at 75% opacity


Another example is where I use the Clouds pattern at a scale of 1 set to Luminosity of 100%. This looks nice! When I add a second pattern - Woven Flat at a scale of 20 set to Screen with an opacity of 100% I get a very attractive looking woven pattern.

Original Layer

Clouds pattern at a scale of 1
set to Luminosity of 100%


Second pattern added - Woven Flat
at a scale of 20 set to
Screen with an opacity of 100%

I hope I have given you some tips to encourage you to explore texture through patterns! I would love to see what you come up with . . . leave me a comment.

Wednesday, August 22, 2007

Adding Texture to Your Layouts

One of the things that has always caught my eye in all forms of art is texture. If a photo or painting or layout makes me FEEL a part of it, I consider it to be a very successful example of art!

Texture can be defined as "A distinctive, complex underlying pattern or structure." In traditional paper scrapbooking, you can't help but have texture in your layouts because you are working with tactile items - papers, ribbons, buttons, fabric. Of course in digital scrapbooking, we use those same items and through the clever use of bevels and shadowing, we can achieve that same texture and depth in our layouts.

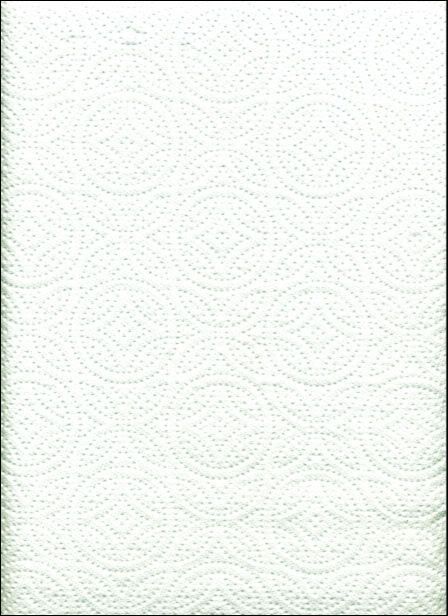
One way to add texture using either Photoshop or Photoshop Elements is to do just that! You will need to use the Texturizer filter by choosing Filter, Texture, Texturizer from the menus. The Texturizer offers 4 default textures which are always on the drop down menu. In addition, whatever the last texture was that you used, that will be in place when you next use the Texturizer. You may also choose to load a texture by clicking the right-facing arrow and choosing Load Texture. This is where the REAL fun comes in! The texture that you add needs to be a file in .psd format but it can be of anything! You could save a photo as a .psd file (think pictures of bark, gravel, grass, seashells, etc.). You can also scan in items and use those (think fabric, wood, coffee beans, candies, etc.). Below, I will describe how I scanned in a paper towel to use with the Texturizer filter.

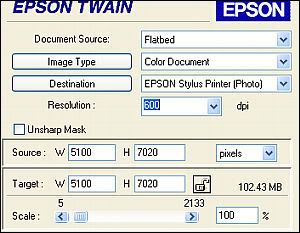
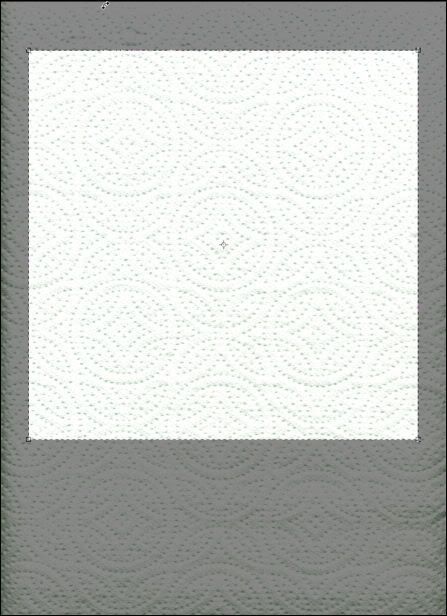
First, since most of you will not have a super-duper scanner capable of scanning in something that would cover a 12 x 12 inch area, you will need to use the settings I used to accommodate for this lack. Though each scanner is different, you will want to scan as large an item as possible. My paper towel basically covered the scanner because it was a really long paper towel! Because I wanted its end size to be 12 x 12 inches or 3600 x 3600 pixels, I needed to scan it larger than at 300 dpi because that would not have been big enough. I doubled the dpi to 600 and scanned.


Click image for larger view

Once I had the document in Photoshop, I saw that it was much too bright, not allowing me to see the details of the paper towel. I added a levels adjustment to make the pattern stand out more on the paper towel. I was not worried by the outside shadowing of the edges because I knew I would be cropping those off.

Click image for larger view

Click image for larger view

Next, I got rid of the color in the paper towel by using the shortcut Control+Shift+U which desaturated the image.

Next, I chose the Crop Tool and used the settings of 12 in for both Height and Width and set the resolution to 300. I pulled out the crop tool on the image and then moved the selection around to try and get the best selection of the pattern.


Click image for larger view

After cropping, I saved the document as paper_towel.psd in my folder for textures (this is a folder that I keep outside of Photoshop/Photoshop Elements).

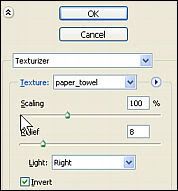
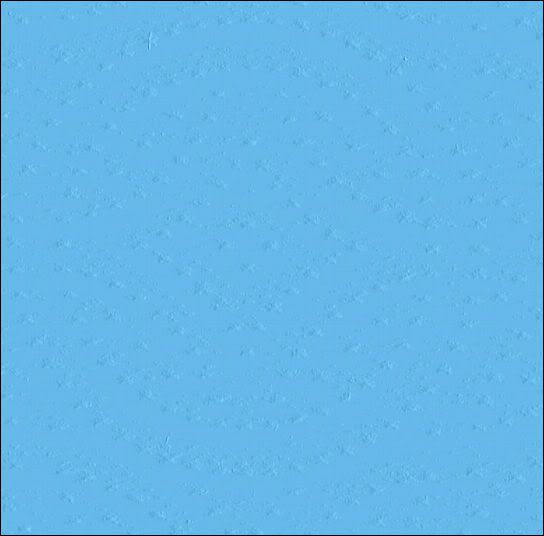
Now, let's apply it. I created a new document and filled the layer with blue. I then chose Filter, Texture, Texturizer. Click on the right-facing arrow and choose Load Texture. Navigate to where you saved the scanned item and choose it. Next, you will need to adjust the Scaling, Relief and Light settings to get the look you want for your paper.


Click images for larger view

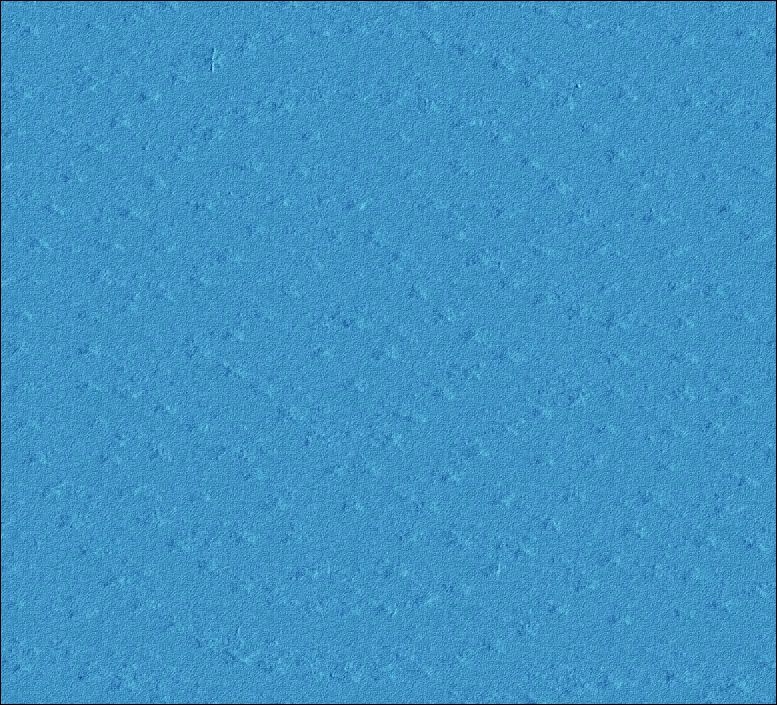
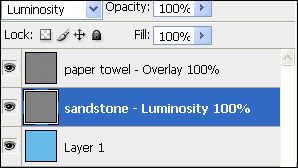
One other way to add texture using the Texturizer is to add a new layer and fill it with 50% gray by choosing Edit, Fill, 50% Gray. On the Layers Palette, change the layer blend mode from Normal to Overlay. Go ahead and apply your texture to this gray layer. Then, if the texture is too strong, you can adjust the opacity to suit. Also try different blend modes. Using this separate layer for the texture also works well if you want to mix more than one texture. On the image below, I applied my paper towel texture to one layer and set the layer blend mode to Overlay. On another layer, I applied the Sandstone texture and set its blend mode to Luminosity.

Click images for larger view

Hope you have fun experimenting with this texture technique! If you come up with some unique textures, please leave me a comment!

Wednesday, August 15, 2007

Organizing With ACDSee

When you begin digital scrapbooking, of course the most important tools you will need are a computer and a graphics program of some type with which to create your layouts. The second most important tool for me is an organizational tool.

It is not long after getting into scrapping that you wonder how you will ever manage to FIND that great kit or two that you downloaded or purchased! If you do a search for "organizing" on any of the digital scrapbooking forums such as Digishoptalk, you will find several recommended methods for organizing your digital supplies.

Some people prefer the Gina Miller method. Gina renames her folders when she purchases using this format: DesignerNameKITNAME. She then burns all her stuff to DVDs to get them off the drive. Anything she thinks she will use a lot of (like elements) she retains on her hard drive but copies them into the appropriate ELEMENTS or other sub-folder and then are renamed in this format: DesignerNameELEMENT.TYPE eg. CorinaNielsenPINK.BUTTON.

Some people actually break up their kits and store the items in folders such as papers, elements, etc. Those that use this type of folder system generally make sure that their folders show a preview of what is inside it. To do this you can simply go into each kit, duplicate the preview, rename it to "folder.jpg" (even if it is a png file) and the Windows folder will show the thumbnail. For this reason, users who use this method prefer that designers name their previews "folder" so they show the image preview on the folder.

Still others (myself included before I switched over to ACDSee) made use of either Photoshop Album or the Organizer within Photoshop Elements. The beauty of this method is that you can assign a kit and its contents to multiple categories that you create. For instance, a kit could be filed under Page Kits, Heritage, and the color Brown, easily allowing you to search under any or all of these categories. In addition, kits could be stored on CDs or DVDs and still be accessible and easy to find. The one pitfall in using this system (as I quickly found out!) is that the database bogs down after about 20 GB of stuff. Now you may think that you will never have that much stuff . . . BUT YOU WILL!

There was a brief interlude where I tried using Digital Scraproom to organize my supplies. This was a database designed for scrappers and looked promising. Unfortunately, it bogged down and made it very difficult to use. It is now defunct.

A major problem with all of the above organizing methods is that .png files do not preview properly. This is especially problematic for digital scrappers .png is the format used for elements and alphas. Not being able to properly preview these items is not very helpful!

Then I discovered ACDSee! My digital scrapping life improved dramatically! I was quickly able to organize my supplies according to several different categories and even store them off my hard drive in CDs and DVDs. I did not have to rename my kits or copy them into special folders. I could easily conduct searches for my supplies across categories. Life was sweet!

To help with my changeover to ACDSee, I came to rely on Connie and Heidi of DigiScrapInfo. They are definitely the ACDSee gurus of the digital scrapping community! At their site you will find everything you need to get started using ACDSee and I recommend that you go there to check out their wonderful tutorials BEFORE you start organizing with ACDSee. They have excellent categories that you can download and use in the program instead of going to the trouble of creating your own!

Now, if that wasn't enough, DigiScrapInfo now offers videos that show you how to use ACDSee! What will these two ladies come up with next to help us organize? I can hardly wait! You can download a 30 day trial of ACDSee Photo Manager 9 to help you get started. You will also want to sign up for updates from their blog so you can keep up with all the great ACDSee information that they share.

For any of you who use Macs, unfortunately ACDSee was designed for the Windows platform. However, there is a program called Shoebox that you will want to investigate. Katie, a Shoebox user, was a guest blogger at DigiScrapInfo and shared some great info on the program.

Monday, August 13, 2007

Sneak Peak and a Few Odds & Ends - UPDATED!

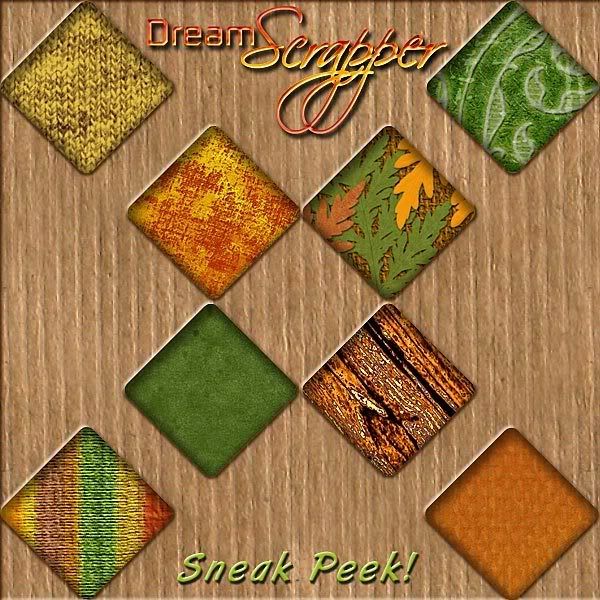
The time is drawing nearer . . . when I can actually open the doors to DreamScrapper.com! Today I am offering you a little sneak peek. Be aware that you really MUST see the product because the preview cannot show it to its fullest potential. Be sure to click on the image below to see the detail in this preview.


You will definitely want to get this for all your Fall layouts . . . and this sneak peek is just showing you the papers . . . just wait!


Now for a few tips I have picked up in the last few days . . .


Boring Photoshop/Photoshop Elements Desktop Color

Have you ever wanted to change the color of your Photoshop or Photoshop Elements desktop? You know, that boring grey color that surrounds the maximized layout or photo on which you are currently working? Well, there IS a way to do just that!

  1. First, you must have a document open.
  2. Maximize the document by double-clicking the top bar of its window.
  3. Select the color that you want by clicking the Foreground color.
  4. Select the Paint Bucket tool.
  5. Shift-click on the desktop with the Paint Bucket. This color will stay until you change it to something else or reset your Photoshop preferences file.
  6. If you ever want to change back to the grey color that you had before, you can simply select the Eyedropper tool and click and hold on the Photoshop desktop and then drag over to one of the palettes until the color changes back to grey. If you just want to select the grey color, click on the foreground color and type c0c0c0 in the box beside the #. (That's C-zero-C-zero-C-zero)


Missing .PSD Thumbnails in Windows Explorer

Have you ever been frustrated because you cannot view a thumbnail for your Photoshop or Photoshop Elements files when viewing files in Windows Explore? Tell me, what use is it to see a colored square with .PSD on it? If this is the case for you, you will want to get ThumbView.


Unzipping Files

Are you still unzipping your downloaded files the old fashioned way? By that, I mean one by one by one. If this describes you, you need to UnZipThemAll. Load up all your downloads, whether they be .zip files, .rar files or some other type of archive file and let 'er rip!
Be sure to check out the way that you can customize the unzipping and file destinations.


UPDATE

I'm not sure what I was thinking when I posted about UnZipThemAll but though I have used and really liked it, I now use another program called ExtractNow. You will also want to try this one as I like it even better than UnZipThemAll.

Friday, August 10, 2007

Scrapbooking Shortcuts for Photoshop and Photoshop Elements

I use a number of keyboard shortcuts in Photoshop (PS) and Photoshop Elements (PE) to help me work faster and more efficiently. I hate having to dig through menus to find a command when I can execute it easily with a couple of keys!

Tonight, I have prepared my list of favorite shortcuts - the ones that I find useful and use frequently. I do not use ALL the shortcuts that are available for PS or PE - I draw the line at having to stand on my head while holding down five or more different keys at the same time, using various parts of my body, in order to execute a command! There is only one shortcut that I will list here that uses four keys at the same time but the shortcut is so useful to me and I use it so frequently that my dexterity has improved considerably since I began using it!

It is my hope that you will try out some of the keyboard shortcuts on my list and find the ones that work the best for you. Once you have those ones memorized, you can always add more shortcuts to your scrapbooking arsenal, a few at a time.

Control+A . . . selects all of a layer or all of text that you are editing at the time

Control+C . . . copy a selection of text or something that is selected with a marquee of some sort

Control+D . . . deselect

Control+E . . . select layers and then you can merge them together or if you are on a layer and choose this shortcut, you will merge down to the next layer

Control+I . . . this will invert colors on your current layer (black will become white, colors will change to their complementary colors)

Control+J . . . this is a BIG favorite of mine! This will duplicate the current layer or duplicate the current selection to a new layer. MUCH faster than right clicking and choosing duplicate.

Control+N . . . brings up the Create New Document dialog box

Control+T . . . Free Transform (thus the "T") and from here, I can right click to choose Distort, Skew, etc.

Control+V . . . pastes - this will be pasted onto a new layer so you don't have to create one first

Control+X . . . cuts the current selection

Control+V . . . temporarily lets you switch to the Move Tool from a different tool

Control+Z . . . backup one step (PS) or multiple steps if you repeat it in PE

Alt+Backspace . . . fills the current layer or selection with the foreground color

Control+Backspace . . . fills the current layer or selection with the background color

Control+Shift+I . . . this will inverse a selection

[ . . . using this square bracket key allows you to make your paint brush smaller

] . . . makes the paint brush bigger

D . . . using this letter will reset your color swatches to the default colors of black and white

X . . . swaps the foreground and background colors, whatever they may be

V . . . switches to the Move Tool


Now for my ultimate favorite shortcut . . . drum roll, please! . . .


Control+Alt+Shift+E . . . in PS, select your top most visible layer and this shortcut will merge all visible layers/effects to a new layer while leaving the existing layers intact. To execute this tricky shortcut, I use my ring finger on the Control key, middle finger on Shift, pointer finger on Alt and use my right hand to add the E. In PE, you will need to create the layer first.

One more set of shortcuts that is a life saver and works in both PS and PE is to easily center something on a layer (especially crucial to PE since there are no guidelines to use) . . .

  1. Control+A to select the entire layer.
  2. Control+X to cut the entire layer.
  3. Control+V to paste it back again. It will be exactly in the center of your document!
(Special note: This will NOT work with shapes - the layer must be rasterized first.)


I am sure there are other invaluable shortcuts that you have found to be useful. If you would like to leave me a suggestion for a useful shortcut, I will add it to the list here!

Saturday, August 4, 2007

Getting Started in Digital Scrapbooking

This blog post is for newcomers to digital scrapbooking. First, welcome to the digital scrapbooking community! You will find that there are a lot of knowledgeable people willing to help those who are starting out by sharing techniques and answering your many questions.

One of the biggest hurdles for those of you making the switch from paper to digital is to understand the digital terminology and how it equates with the traditional paper scrapbooking tools and techniques.

To help you with this I will point you to the Artful Crafter where she outlines six tools/techniques that you will able to use in either Photoshop or Photoshop Elements.

You will also want to check out some of my previous posts for more tools of use to you in digital scrapbooking:

  1. Tools for Digital Scrapbooking
  2. Kit and Kaboodle
  3. If You Use Photoshop or Photoshop Elements, You May Need an Adjustment
  4. Forum Acronyms Revealed
If you are a newcomer to digital scrapbooking, I would love to hear from you. Leave me a comment to say that you dropped by and be sure to look around my blog for links to my favorite digiscrapping sites and blogs.

Thursday, August 2, 2007

If You Use Photoshop or Photoshop Elements, You May Need an Adjustment - UPDATED

. . . layer, that is! If you are anything like me, when you are creating a digital layout you may decide to try things many different ways before deciding on THE way! The beauty of using adjustment layers is that you can reserve the right to change your mind not once, not twice, but as many times as you want during the building of your layout and you can change your mind about color, contrast, patterns . . . the list goes on . . .

So, what ARE adjustment layers, you ask? Adjustment layers are special layers that provide different types of adjustments to a layer or layers beneath them. These adjustments are editable at any time, even after saving and closing the layered file, unlike simply choosing to apply a Hue/Saturation adjustment, for instance. In addition, these adjustment layers can have their opacity adjusted as well as their layer blend modes, just like regular layers. You can turn these adjustment layers on or off to see how they affect things. If that wasn't enough, all adjustment layers come with a layer mask which allow you to apply the adjustment to all or just a portion of a layer(s).

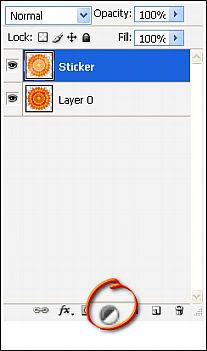
Icon for Add Adjustment or Fill Layer

Of course in Photoshop and Photoshop Elements, there are several ways to do things. To add an adjustment layer, you can choose Layer, New Adjustment Layer or on the Layers Palette you can click the icon that looks like a black and white beach ball. Your choice! Because there have been several tutorials written about adjustment layers, instead of reinventing the wheel, I will direct you to a few excellent resources to get you started using adjustment layers.


Photoshop Adjustment Layers 101
This is an excellent place to start learning about adjustment layers!

How to Use Layer Masks and Adjustment Layers in Photoshop Part 2
This resource is a video tutorial. It would be helpful for you to watch Part 1 which deals with layer masks, as they are mentioned in part 2. (Watch for a future blog post on layer masks!)

Using Photoshop Adjustment Layers
This is the most in-depth resource that I found on adjustment layers.

Tinting Tutorial
One other source of information on Adjustment Layers comes from Hummie. She shows ways to convert to black and white and tint a photo using a hue/saturation adjustment layer and also a way to tint a photo using the photo filter adjustment layer. This link takes you to the main tutorial page. Scroll down to find the tinting tutorial.

So, if you like to have flexibility in designing your digital layouts (and isn't this one of THE advantages to scrapping digital?) you will definitely want to try using adjustment layers!

Monday, July 30, 2007

Kit and Kaboodle!

I had the chance to create another layout today. I am pleased with the way it turned out. It details the start of my daughter's trip to Calgary this summer. What do you think?

Click image for full credits.

Now, I promised that I would give you some info on Kaboodle . . . another tool to add to your digital scrapbooking arsenal!

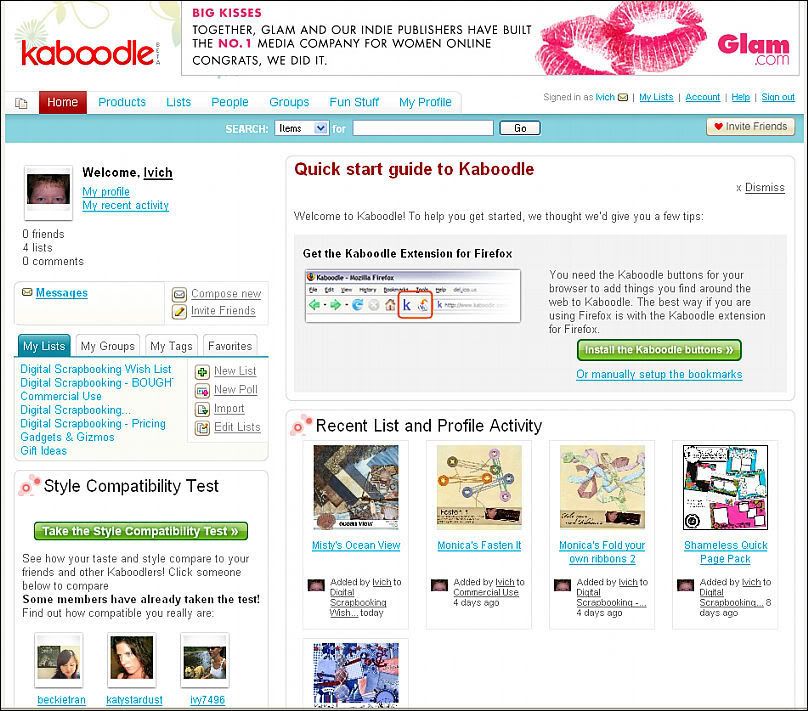
What the heck is a kaboodle and why do I need it? Kaboodle is a quick and easy way to keep lists of items from the internet. In Kaboodle, you can create several different lists such as a Digital Scrapbooking Wish List, Inspirational Layouts, etc. Kaboodle is very easy to set up and involves installing two buttons o
n the navigation bar of your web browser. One button will take you to Kaboodle to look over your lists, organize, etc. The other button will allow you to add things to your Kaboodle lists.


The way that Kaboodle works when you add something to it is really slick! After clicking the Add to Kaboodle button, you will be taken to your Kaboodle main page where you can choose the list that you want to use. Then, you can fill in a description or comment, if you want, and tags. Tags help you and others to find items on Kaboodle. So if you were adding a kit by Misty Cato, you might include her name as a tag, as well as "page kit", and other terms that may help in searching for the item. You also have the opportunity to create a new section in the list to place your item. For instance, you might have different sections for different stores or you could just insert the store name as a tag.

Let's see how it works. I'm looking at Misty Cato's new kit,
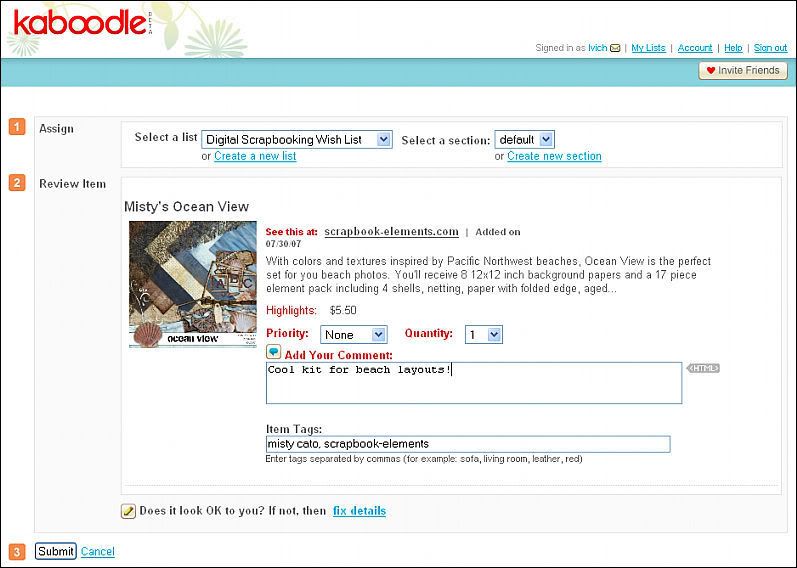
Misty's Ocean View. I have made sure to navigate to the individual product page to get the largest image size available. I click my Add to Kaboodle button and this is what I see:

Click image for larger view.

Note the three sections to be completed:
  1. Assign - decide what list you wish to use and create a new section if desired.
  2. Review Item - Add a comment, if desired, and tags. Be sure that the image looks correct. If it doesn't or there is no image, click "fix details" to be presented with a choice of images.
  3. Submit - Click here to add the item.
I have assigned the item to my Digital Scrapbooking Wish List, added a comment and assigned the tags, "misty cato" and "scrapbook-elements."

Now, after clicking the button you are magically transferred back to the page you were on and you don't even have to press the back button a few times to get back to where you really wanted to be! Sweet!

Ok, so now you have the item on your list, so what? Well, let's pretend to buy something to see how Kaboodle helps us.

Click the Kaboodle button to be taken to your main Kaboodle interface. This is what I see at mine:

Click image for larger view.

I want to buy something from my Wish List so I click on the link for that in the My Lists section. Then I can scroll through my list until I find what I want to buy. I'd like to get the Goin' Postal Frames & Clusters so I click on that link to be taken to the individual page. There I get a larger view of the item and I can read its full description. If I still want to buy, I click on the link in the Shop For It box. This takes me right to the item in the store and I can proceed with my purchase.

To help you even more with your scrapbooking addiction, to the right you will see links to other related items or even links to other people's lists! If you view their list and find something you want on it, you can click on an Add to My List button and now it's on your list!

Now there is so much more to Kaboodle . . . you can get buttons for your blog or website, you can send a link of your Wish List to friends and family and you can display your lists in different ways such as slide shows.

One other reason you would want to use Kaboodle . . . to get FREE STUFF!

In my earlier post, Forum Acronyms Revealed! I gave links to some short forms that are used a lot on digital scrapbooking forums. If you checked out the Digital Scrapbook Lingo link, you may have read about a RAK or Random Act of Kindness. Designers have been known to look through the wish lists on Kaboodle and send a freebie to a lucky recipient!

So, if you haven't done so already, go check out Kaboodle! Be sure to check out the quick start guide and then explore all the other things that Kaboodle has to offer!

If you currently are a Kaboodle user, be sure to leave me a comment about ways that you use Kaboodle.

Saturday, July 28, 2007

Tools for Digital Scrapbooking

Well, no freebies today . . . I actually got some scrapbooking done for myself! The layout is created mainly using Shameless by Kim Jensen. As soon as I saw that kit, I knew I would have to get it! Needless to say, it didn't remain on my Kaboodle list for long! Here is my two-page layout from today:


Now, I promised you some tools for scrapbooking . . . I will share a few with you today.

First, I will deal with a few tools that make your online shopping and viewing experience a LOT easier and more enjoyable.

Firefox Mozilla is my browser of choice, even though Internet Explorer has recently been upgraded to contain some similar features. Why do I like Firefox? I first switched over to it because of the tabbed viewing. Tabbed viewing allows you to have multiple web pages open at the same time and navigate easily between them by simply clicking the "tab" for that page. Having several pages open at the same time allows me to view one page while another is loading or to download from one page and read a forum in another. I can also bookmark groups of pages/tabs to open at the same time. This allows me to organize the forums, for instance, that I read on a daily basis. Instead of opening one bookmark and then another, I can open all at once.

Another reason that I am partial to Firefox is because of the many Add-ons or Extensions that you can get for it that also help me to browse forums quickly or to navigate more effectively. One such add-on I would not be without is Cooliris.

Cooliris really lets me fly through the forums! Instead of clicking on each post that I think I might like to read, I can simply hover my cursor over the link to get a popup window which displays the page. I can easily navigate through this page to read an entire thread or simply move my mouse to exit from it if it doesn't appeal to me. If instead I had clicked a link, I would then have to click the back button to return to where I was and wait for the page to load. Cool Iris is also good for checking out freebies. A lot of posters of freebies will include a preview in the post. I can easily view the post to see if the freebie is of interest to me.

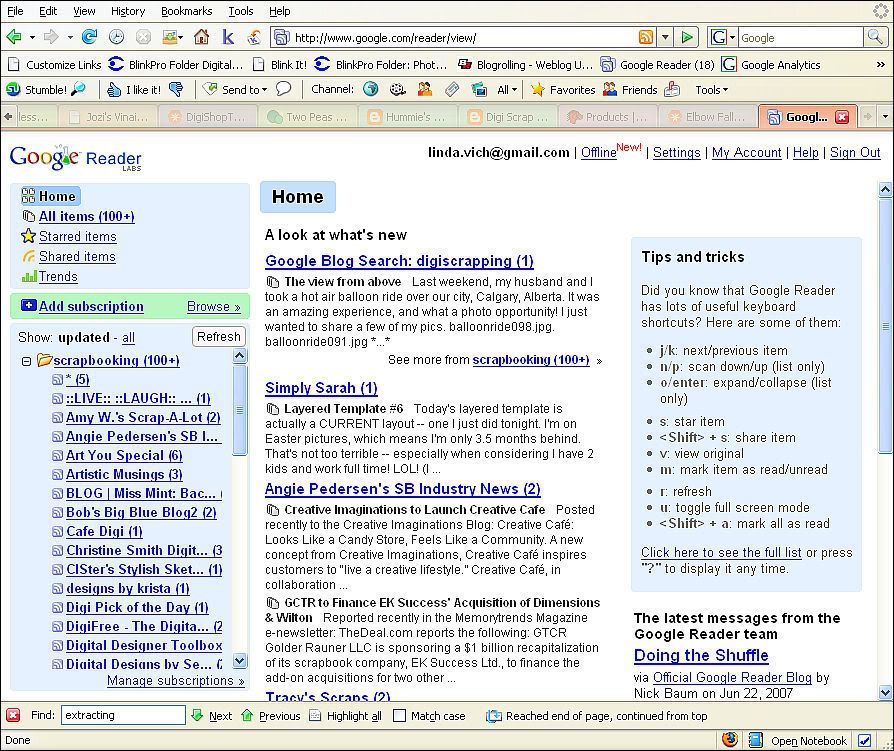
Another tool for the web that helps me keep up with the world of scrapbooking is the blog reader, Google Reader. Google Reader allows me to easily subscribe to all the blogs that I read ( and there are several!) but keep and access them all in one place. The listing of blogs is easily configured to show you a link only to those blogs that have been updated since your last visit. This is a tremendous timesaver because I don't have to travel to each individual site to see if a blog has an update.

Click on image to see larger view

Well, that's all for today! Stay tuned for some time saving tools to help you with your scrapbooking.

One other tool that I have just started using and enjoying is Kaboodle. However, I will have to save blogging about that one for another day as it is getting late!